
Blue Diamond - Phase 2
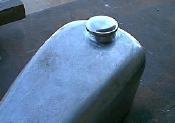
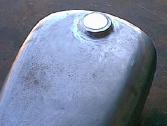
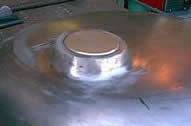
Here we have detailed some of the items that we have fabricated. This is what makes a custom a CUSTOM! Here are before and after shots of the tank and the gas cap. We used a flush mount cap from World Class Customs... a very fine piece... We had to cut the old bayonett style cap out then fit, weld and grind the new one in. It came out very nicely! A little body filler and this will be smooth as can be! You have to be very careful welding on a gas tank. Too much heat and you deform the tank and get to throw it in the trash. Careful welding, small spots, and waiting for everything to cool will protect it's integrity. The grinding also has to be done slowly, so to keep the heat to a minimum.
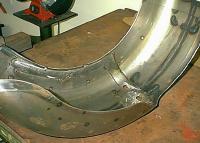
Next we turned our attention to the fender (there is only 1 fender for this sled!). Trying to make rolling art, would not allow us to use the external fender support from Kennedy... so how do we support this, without the UGLY methods we see from others, that have bolts or bumps showing from the outside?? It may be difficult to see this from the picture, but we fabricated 1/8" steel plate to wrap the curve around the tire, then molded another piece to cover the curve where the fender meets under the seat. Two strong bolts from underneath and Presto! Like the 'Cross Your Heart', no visible means of support! Strong enough to hold a passenger, and still clear the monster tire.
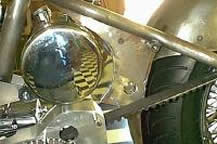
Another problem we had was where to put some electrics and how to hide the wire. There was no way we were going to use a pre-fab electric box on this ride... We solved this by making a small box that would fit tight behind the battery box (can't see it can you? )... then what about that ugly box? The solution was to make side panels that would hide the box, the top of the battery, and the wires between the fender and the oil tank. As you can see, the panels fit tight, and we don't have to mold this to the fender or frame, so we can still service the battery, without taking off the fender. Once painted, we think these will add nicely to the lines and serve the purpose of keeping everything clean!
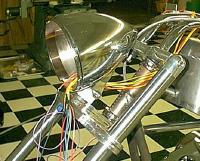
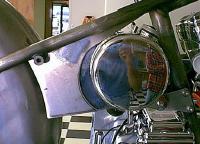
The rest of the wiring is underway and being tested. We expect to put signals on this bike, which causes its own dilemna... Signals on a chopper?!? How can you keep it clean and have signals too! Well this 7" headlight from Ness helps a bit... We will have relays and turn signal equipment stuffed in this large empty shell.. We are going to use the front signals from the Harley 'Duece' and mount them under the headlight shell. They are shaped just like the headlight and will hardly be seen from the side, but will show up fine from the front. In the rear we will use a Yafee Diamond LED tail light, and some custom LED's for the signals, all frenched into the fender. We need only to run a small harness from the battery to the headlight, 3 wires from each of the handlebar controls, and 2 wires from each of the front signals. It will be VERY clean and DOT ready!
|
Continue on to Phase III, the Final Mockup Phase... |
|